How to create a Water Level indication System
The Water Level Indicating System using Arduino Uno Microcontroller is a simple and useful electronics project designed to monitor and indicate the water level inside a tank. The system uses water-level sensing points placed at different heights of the tank to detect the amount of water present. The Arduino Uno receives signals from these sensing points and determines the current water level. LEDs can be used to indicate different levels, such as Low, Medium, and High, allowing the user to easily monitor the tank without opening it. This project demonstrates the practical use of a microcontroller, sensors, LEDs, and basic electronic circuits to create an automatic water-level monitoring system.
It is an electronic project designed to monitor and indicate the water level inside a tank. The system uses water-level sensing points placed at different heights of the tank to detect the amount of water present. The Arduino Uno receives signals from these sensing points and determines the current water level. LEDs can be used to indicate different levels, such as Low, Medium, and High, allowing the user to easily monitor the tank without opening it. This project demonstrates the practical use of a microcontroller, sensors, LEDs, and basic electronic circuits to create an automatic water-level monitoring system.
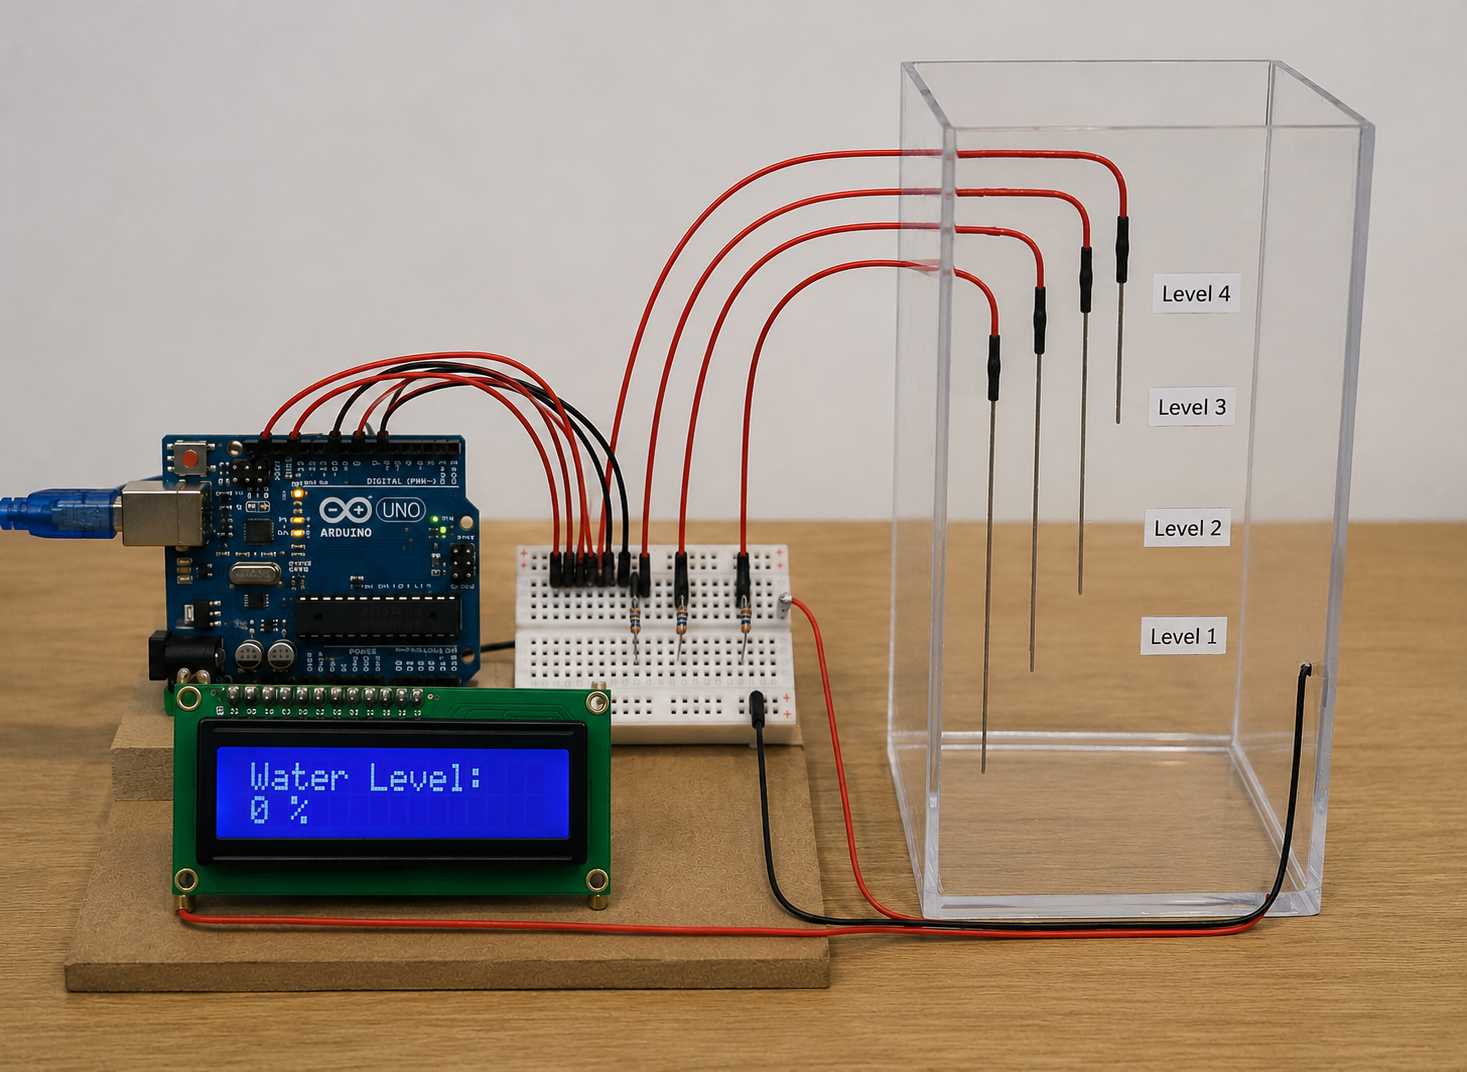
Circuit Diagram of Water Level indication System
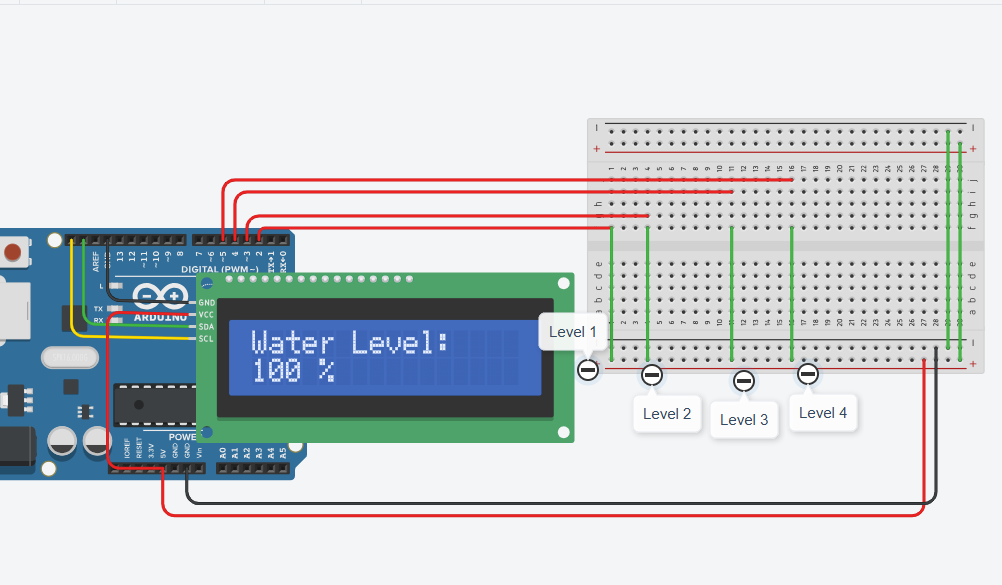
What are the Components required for Water Level indicator System
Here are the several components used in water Level indicating system.
Arduino UNO
The Arduino Uno is the main control unit of the Water Level Indicating System. It is based on the ATmega328P Microcontroller and provides digital input and output pins that can be used to connect the water-level probes and indicator LEDs. The Arduino continuously reads the signals from the sensing points and determines which water level has been reached. According to the programmed conditions, it activates the corresponding LEDs to indicate the current level of water. It is suitable for this project because it is easy to program, provides sufficient input/output pins, and operates at 5V logic.
Water Level Sensor / Probes
The water-level probes are responsible for detecting the presence of water at different heights in the tank. Multiple probes can be positioned at different levels, for example Low, Medium, and High. When water reaches a particular probe, it creates a conductive path between the sensing probe and the common reference connection. This produces a change in the electrical signal that can be detected by the Arduino. By checking the probes individually, the Arduino can determine how far the water has risen inside the tank.
Breadboard
A breadboard is used to assemble the circuit during the development and testing stage. It contains interconnected holes that allow electronic components and jumper wires to be connected without soldering. The Arduino, LEDs, resistors, and water-level probes can be easily connected and rearranged on the breadboard. This makes troubleshooting and modifying the circuit much easier during project development.
Water Tank / Container
The water tank or container represents the actual storage tank whose water level is being monitored. The sensing probes are installed at different heights inside the container. As the tank fills, water reaches the probes one by one, allowing the Arduino to identify the approximate water level. The container should be made from a suitable non-conductive material so that the sensing probes can detect the water without unwanted electrical connections through the tank itself.
Working of Water Level indicating system

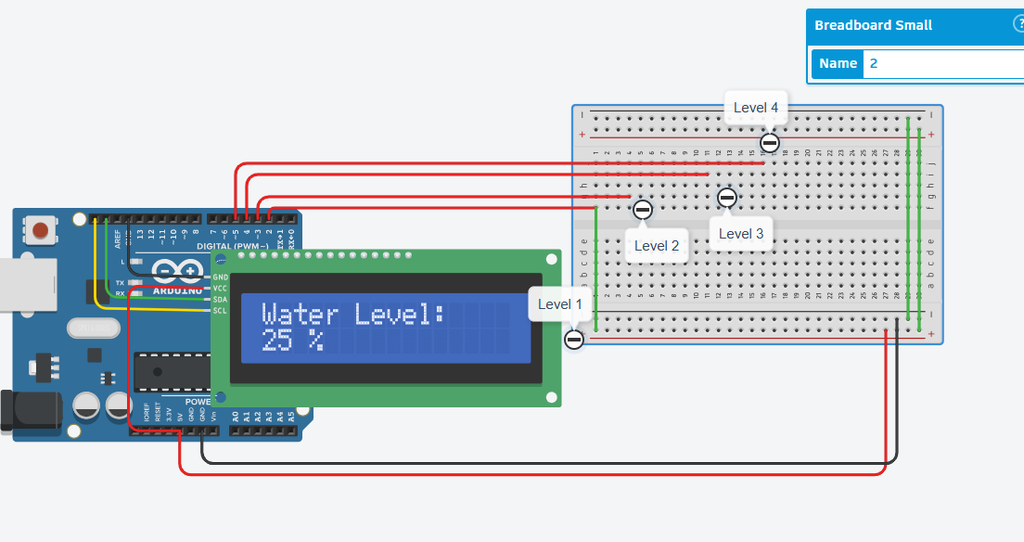

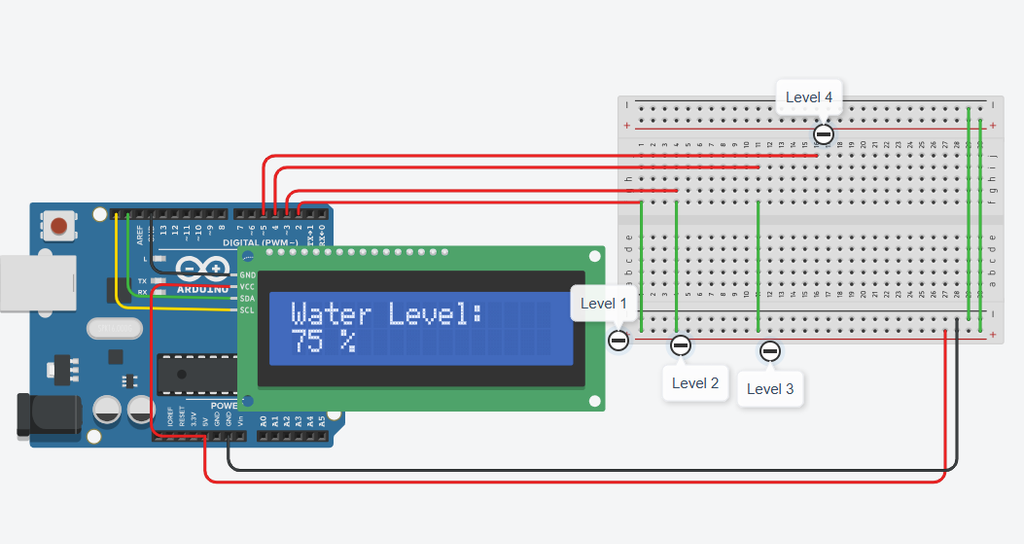

Code of Water Level indication system
Here is the Arduino IDE code of Water Level indication system is Written in C++ shown.